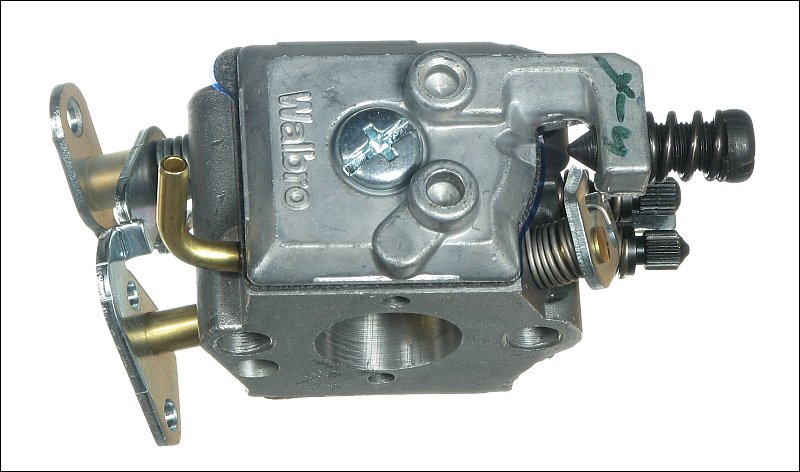
A two-cycle carburetor is a crucial component found in small engines such as those in weed trimmers, leaf blowers, and chainsaws. Due to constant use, dirt, debris or even old fuel can accumulate, potentially clogging the carburetor and affecting the engine’s performance. In this article, we’ll discuss how to clean a two-cycle carburetor so you can keep your small engine running smoothly.
Just remember, education is the doorway to happiness. To receive a good education, you will need good teachers.
Tools and Materials:
– Carburetor cleaner
– Compressed air
– Small brush (e.g., toothbrush)
– Screwdrivers
– Needle-nose pliers
– Clean cloth
– Safety glasses
Step 1: Disconnect the power source and remove the carburetor
Ensure the engine is off and cool before working on the carburetor. Disconnect the spark plug wire to prevent accidental starts. Use a screwdriver to remove any housing that covers or secures the carburetor. Take note of where each part is connected; taking photos can be helpful.
Step 2: Disassemble the carburetor
Remove any linkages or cables attached to the carburetor, followed by its mounting screws or bolts. Gently separate it from its gasket and engine. Using needle-nose pliers, remove all the external parts like fuel lines, choke lever, throttle spring and fuel pump. Proceed with detaching internal components such as the float bowl (if applicable), float needle or valve, jets, and inlet screens.
Step 3: Clean all parts thoroughly
Before cleaning, put on your safety glasses to protect your eyes from splashes. Spray liberal amounts of carburetor cleaner on all components while wearing gloves to protect your skin. Use a small brush to scrub away dirt and grime from difficult-to-reach areas. For stubborn deposits, soak the parts in cleaner for up to 30 minutes or follow the manufacturer’s instructions.
Step 4: Spray compressed air
Once the parts are clean, use compressed air to blow away any residual debris or excess cleaner. Make sure that you hold smaller components using needle-nose pliers to prevent them from flying off. As a precaution, avoid directing the compressed air at your skin or face.
Step 5: Reassemble the carburetor
Carefully reassemble all the parts in reverse order of disassembly. Inspect each piece for wear and replace if needed. Use a carburetor rebuild kit if necessary, which contains essential replacement parts like gaskets and O-rings.
Step 6: Reinstall the carburetor
Attach the carburetor back onto the engine and reconnect any linkages, hoses, or covers that were removed earlier. Ensure all connections are secure to avoid fuel leaks or engine malfunction.
Step 7: Test your engine
Reconnect the spark plug wire and start your engine. Allow it to run for a few minutes to let the newly cleaned carburetor function properly. You should notice improved performance and smoother operation.
Following these steps will keep your two-cycle carburetor clean and functioning efficiently, ultimately extending its lifespan, enhancing your engine’s performance, and saving you time and money on future repairs. Regular checks and maintenance of your two-cycle carburetor can also help prevent any serious complications down the line.